If your foundation ever looks cakey, clings to dry patches, settles into fine lines, or fades unevenly by midday, the issue often isn’t the makeup itself — it’s what’s underneath it.
Hydration is the difference between foundation that sits on top of your skin and foundation that melts seamlessly into it. When your skin is properly prepped, makeup applies more evenly, lasts longer, and looks naturally radiant instead of heavy or textured.
The secret to flawless foundation isn’t more coverage. It’s better skin prep.
Here’s exactly how to hydrate your skin properly before applying foundation — step by step.
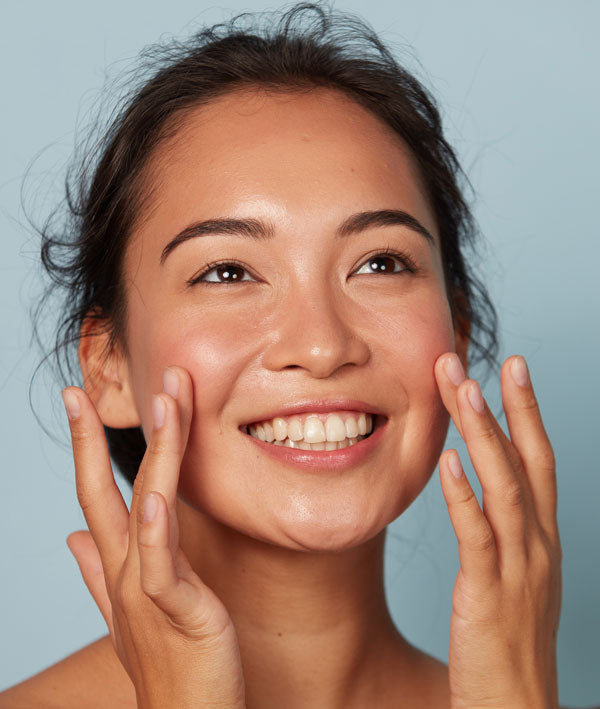
Why Hydrated Skin Is the Key to Flawless Foundation
Foundation adheres to the outermost layer of your skin. If that surface is dry, rough, or dehydrated, pigment will cling unevenly. This creates:
-
Patchiness
-
Flaking
-
Cakey buildup
-
Emphasized pores
-
Creasing around fine lines
When your skin is hydrated, however, the surface becomes smoother and more flexible. Hydrated skin has a subtle plumpness that allows foundation to glide on instead of dragging across texture.
It’s important to understand the difference between dry skin and dehydrated skin:
-
Dry skin lacks oil (lipids).
-
Dehydrated skin lacks water.
Even oily skin can be dehydrated — and dehydration is one of the biggest causes of makeup that doesn’t sit right.
Proper hydration:
-
Plumps fine lines
-
Improves elasticity
-
Reduces the appearance of texture
-
Helps makeup blend more easily
-
Extends wear time
Think of hydration as priming your canvas. When the skin barrier is balanced and moisturized, foundation becomes the finishing touch — not the fix.
Step 1: Start with a Gentle Cleanser
Hydration starts with cleansing — but not the stripping kind.
If your cleanser leaves your skin feeling tight or squeaky-clean, it may be removing too much of your natural barrier. That tight sensation is often an early sign of dehydration.
Choose a gentle, non-foaming or low-foaming cleanser that:
-
Removes dirt and excess oil
-
Maintains your skin’s pH balance
-
Doesn’t disrupt your moisture barrier
Cleansing removes residue from skincare, sweat, and environmental pollutants that can interfere with foundation adherence. But the goal is clean, not stripped.
Pro tip:
Use lukewarm water instead of hot water. Hot water can weaken the skin barrier and increase water loss, making your foundation cling to dry areas later.
After cleansing, gently pat your skin dry with a soft towel. Avoid rubbing — friction can cause mild irritation and redness, which may show through foundation.
At this stage, your skin should feel fresh and comfortable, not tight.
Step 2: Apply a Lightweight, Hydrating Serum
This is the step most people skip — and it’s often the one that makes the biggest difference.
A lightweight hydrating serum delivers water-based hydration deep into the skin before heavier creams are applied. This creates a plump, smooth base that foundation can sit on beautifully.
Look for serums that contain:
-
Glycerin
-
Panthenol
-
Aloe vera
Why Hyaluronic Acid Is So Effective
Hyaluronic acid is a humectant, meaning it attracts water into the skin. It can hold up to 1,000 times its weight in water, helping to visibly plump and smooth the surface.
When applied correctly, it:
-
Reduces the appearance of fine lines
-
Softens rough patches
-
Improves foundation blendability
-
Adds a subtle, natural glow
How to apply:
-
Apply to slightly damp skin (this helps bind water).
-
Use a pea-sized amount.
-
Gently press into the skin rather than rubbing aggressively.
Allow the serum to absorb fully before moving to the next step.
For oily or combination skin, this step may be enough hydration underneath a light moisturizer. For dry skin, it acts as a foundational layer of moisture before sealing everything in.

Step 3: Lock in Moisture with a Nourishing Moisturizer
Hydrating serums draw water into the skin — but they need to be sealed in.
A good moisturizer acts as a protective layer, preventing water loss throughout the day. Without this step, your skin can lose hydration quickly, causing foundation to crack or separate hours later.
Choose your moisturizer based on your skin type:
For Dry Skin:
Look for creams containing:
-
Ceramides
-
Shea butter
-
Squalane
-
Fatty acids
These replenish lipids and strengthen the skin barrier.
For Oily or Combination Skin:
Opt for:
-
Lightweight gel creams
-
Oil-free moisturizers
-
Fast-absorbing formulas
Skipping moisturizer because you’re oily can actually make foundation break down faster. Balanced hydration helps regulate oil production and improves longevity.
How to apply:
-
Use a nickel-sized amount.
-
Warm it between your fingers.
-
Press gently into the skin.
Let it absorb for at least 3–5 minutes before applying primer or foundation. Rushing this step can cause pilling.
Your skin should feel supple and smooth — not greasy.
Step 4: Use a Hydrating Primer for a Smooth Base
Primer isn’t just about extending wear — it can also enhance hydration and create a more even texture.
If your foundation tends to settle into pores or cling to dryness, a hydrating primer can create an extra smoothing layer.
Look for primers labeled:
-
Hydrating
-
Luminous
-
Radiance-boosting
-
Smoothing
Avoid mattifying primers if dehydration is your concern, as they can emphasize dryness.
A good hydrating primer:
-
Blurs minor texture
-
Softens fine lines
-
Adds subtle glow
-
Improves foundation grip
Apply a thin layer, focusing on areas where foundation typically breaks down — such as around the nose or cheeks.
Use a light hand. Too much primer can cause slipping or separation.
Let the primer set for about a minute before applying foundation.
Bonus Tips for Long-Lasting Hydration Under Makeup
Even with perfect prep, a few small habits can elevate your results.
Give Each Layer Time to Absorb
Layering products too quickly can cause pilling. Allow each product to settle before applying the next.
Avoid Over-Exfoliating
Excess exfoliation can create invisible micro-flaking that foundation exaggerates. Limit exfoliation to 1–3 times per week depending on your skin type.
Use a Damp Sponge for Application
If you use a beauty sponge, lightly dampen it. This prevents it from absorbing too much foundation and helps press product seamlessly into hydrated skin.
Set Strategically
Use minimal powder on dry-prone areas. Focus powder only where necessary (like the T-zone) to avoid flattening your hydrated glow.
Mist for Extra Glow
A hydrating facial mist after foundation can help melt products together for a skin-like finish.
The Hydration–Foundation Connection
Makeup artistry often focuses on coverage, contouring, and blending techniques — but professional makeup artists consistently emphasize one thing: skin prep.
Foundation should enhance healthy skin, not mask imbalance.
When your skin is:
-
Clean but not stripped
-
Hydrated at multiple levels
-
Properly moisturized
-
Smoothed with a lightweight primer
Foundation becomes easier to apply and more natural-looking.
Instead of layering more product to fix texture, you allow hydration to do the heavy lifting.
Healthy Skin First, Makeup Second
Flawless foundation isn’t about buying the most expensive formula or following every trend. It’s about creating a hydrated, balanced base.
When you prioritize:
-
Gentle cleansing
-
Lightweight hydration with a serum
-
Barrier-supporting moisture
-
A smoothing, hydrating primer
You transform how foundation looks and wears throughout the day.
Hydrated skin reflects light better. It moves naturally with your facial expressions. It resists creasing and cracking.
Most importantly, it allows your makeup to look like skin — only smoother, more even, and radiant.
The glow you’re chasing doesn’t start in your foundation bottle. It starts in your skincare routine.