A flawless self tan doesn’t start with the bottle — it starts with your skincare. If you’ve ever dealt with streaks, patchiness, dark knees, or fading that looks uneven after just a few days, chances are the issue wasn’t the self tanner itself. It was the prep.
Healthy, smooth, well-hydrated skin creates the perfect canvas for an even, natural-looking glow. The good news? With the right routine, you can dramatically improve how your self tanner applies, develops, and fades.
Here’s your complete step-by-step skincare guide to prepping your skin for the ultimate streak-free tan.
Why Skin Prep Is Key for a Streak-Free, Glowing Tan
Self tanners work by reacting with the amino acids in the outermost layer of your skin (the stratum corneum). This reaction creates that bronzed look — but it also means your tan only develops evenly if your skin surface is even.
When your skin has:
-
Dry patches
-
Buildup of dead skin cells
-
Rough texture
-
Uneven hydration
Your self tanner will cling to those areas, creating dark spots, streaks, or blotchy patches.
Proper skin prep ensures:
-
A smoother application
-
More even color development
-
Longer-lasting results
-
A fade that looks natural instead of patchy
Think of it like painting a wall. You wouldn’t apply fresh paint over cracked, dusty, uneven plaster. You’d sand, smooth, and prime first. Your skin deserves the same care.
Step 1: Gently Exfoliate to Remove Dead Skin Cells
Exfoliation is the most important step in pre-tan prep.
Since self tanner develops in the top layer of skin, any buildup of dead cells will create uneven absorption. If you skip exfoliating, your tan may grab onto rough areas — especially elbows, knees, ankles, and wrists — leaving them noticeably darker.
When to Exfoliate
Exfoliate 24 hours before applying self tanner. This gives your skin time to rebalance and avoids irritation.
How to Exfoliate Properly
You have two main options:
1. Physical Exfoliation
-
Body scrubs
-
Exfoliating gloves
-
Gentle polishing treatments
Use light pressure. The goal is to smooth — not strip — your skin.
2. Chemical Exfoliation
-
Lactic acid
-
Glycolic acid
-
Enzyme exfoliants
These dissolve dead skin cells more evenly and can be especially helpful if you’re prone to ingrown hairs or rough texture.
Avoid oil-based scrubs right before tanning, as leftover residue can create a barrier that interferes with even development.
Focus extra attention on:
-
Knees
-
Elbows
-
Ankles
-
Heels
These areas tend to hold onto dry skin and absorb more product.
After exfoliating, rinse thoroughly and avoid heavy lotions for the rest of the day.
Step 2: Hydrate with a Lightweight, Non-Greasy Serum
Hydration is where many people go wrong. They either skip it completely or use a heavy cream that blocks the tanner from developing properly.
The key is hydration without heaviness — and this is where hyaluronic acid shines.
Why Hydration Matters Before Self Tanner
When your skin is dehydrated, it absorbs more product unevenly. Dry areas become darker because they “soak up” the tanner more aggressively.
Well-hydrated skin:
-
Absorbs product more evenly
-
Develops a smoother finish
-
Fades more naturally

Why Hyaluronic Acid Is Ideal
Hyaluronic acid is a humectant, meaning it attracts and holds water in the skin. It delivers hydration without adding oil or leaving residue behind.
Benefits before self tanning:
-
Plumps fine lines and crepey areas
-
Smooths skin texture
-
Boosts elasticity
-
Absorbs quickly
-
Doesn’t interfere with color development
Apply a lightweight hyaluronic acid serum to slightly damp skin after showering. Allow it to fully absorb before applying anything else.
This step creates balanced hydration without forming a barrier that could prevent your tan from developing evenly.
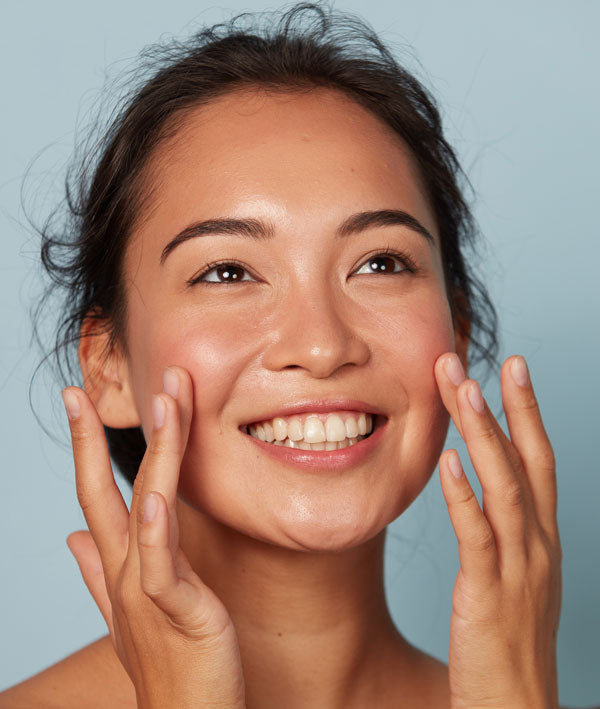
If you’re tanning your face, this step is especially important. Facial skin tends to be more delicate and prone to uneven fading. A lightweight hydrating serum ensures your glow looks natural — not patchy.
Step 3: Moisturize Dry Areas to Prevent Patchiness
Now that your skin is exfoliated and hydrated, it’s time to strategically moisturize.
Notice the word “strategically.” You don’t want to apply a heavy moisturizer all over your body right before tanning. That can dilute your self tanner and cause streaking.
Instead, focus only on dry-prone areas.
Areas That Need Extra Moisture
-
Elbows
-
Knees
-
Ankles
-
Heels
-
Hands
-
Wrists
These areas naturally have thicker or drier skin and tend to absorb more pigment.
How to Apply
Use a lightweight, fast-absorbing lotion. Apply a thin layer and allow it to soak in completely before tanning.
The moisturizer acts as a buffer, preventing these spots from turning too dark.
If your hands and feet tend to develop too much color, apply a slightly thicker layer there — but still blend thoroughly.
Step 4: Hair Removal Timing Matters
Though not always discussed, hair removal plays a major role in tan prep.
Shave or wax at least 24 hours before applying self tanner.
Why?
-
Shaving right before tanning can cause irritation.
-
Freshly shaved pores can absorb extra pigment, leading to dark dots.
-
Waxing can leave skin sensitive and uneven.
Waiting 24 hours allows pores to close and skin to calm down, creating a smoother base.
Step 5: When and How to Apply Your Self Tanner for Best Results
Now that your skin is prepped properly, timing and technique make all the difference.
When to Apply
Apply self tanner at night if possible.
This allows:
-
Full development time
-
Minimal sweating or friction
-
Less disruption from clothing
Make sure your skin is completely dry before application. Even dampness from a shower can dilute product and cause streaks.
How to Apply
-
Use a tanning mitt for even distribution.
-
Work in sections (legs, arms, torso).
-
Apply in circular motions to avoid streaks.
-
Use sparingly on hands, feet, knees, and elbows.
-
Blend carefully around wrists and ankles.
For your face:
-
Use a tanning-specific facial product or mix a drop of tanner with your lightweight moisturizer.
-
Blend into the hairline and jawline.
After Application
-
Wait at least 10–15 minutes before dressing.
-
Wear loose, dark clothing.
-
Avoid water, sweating, or tight fabrics for 6–8 hours.
After your first rinse, gently pat skin dry instead of rubbing.
Maintaining Your Glow
The prep doesn’t end once your tan develops.
To extend your glow:
-
Moisturize daily with a lightweight lotion.
-
Avoid harsh exfoliation for several days.
-
Stay hydrated internally (water matters too).
-
Reapply gradually as needed rather than layering heavily over fading skin.
When it’s time to remove your tan, use gentle exfoliation again to create an even base before reapplying.
The Ultimate Glow Starts with Skin Health
The secret to a flawless self tan isn’t a darker formula — it’s healthier skin.
When you:
-
Exfoliate gently
-
Hydrate with lightweight ingredients like hyaluronic acid
-
Buffer dry areas
-
Apply carefully and patiently
You create the perfect environment for an even, radiant result.
Self tanning should enhance your skin, not highlight dryness or texture. By treating prep as part of your glow ritual — not an afterthought — you ensure your tan looks smooth, natural, and luminous from day one to fade-out.
Beautiful color starts with balanced, well-cared-for skin. And when your skin is prepped properly, your glow speaks for itself.